Projected Image Nights
What is Projected Image Night?
The showing of submitted projected images for discussion and feedback (if desired!)
Submitting Images for discussion
You may enter up to two images for discussion. These images can be of any subject, typically to get feedback.
Using a COPY of your image file (don't use your original), in PhotoShop or other software set the working space to the sRGB standard. This is usually the default setting but if in doubt click on Help and type sRGB into the search field and then follow the instructions for your software.
If you want to crop your image do it before you do any re-sizing. For help you can refer to the links on the right sidebar for assistance.
To maintain the same proportions of width and height check the checkbox to "Constrain proportions" or "Lock aspect ratio" before using the cropping tool. If you want to crop to a different width to height ratio, i.e., a square image, uncheck the checkbox.
Now you can re-size your image to the maximum image size for our projector, 1400W x 1050H. The image can be smaller if you wish.
Set the image size by clicking on Image > Image Size or Image > Resize. Make certain there is a check mark in the Constrain proportions or Lock aspect ratio checkbox and also in the Resample boxes. For a landscape (horizontal) image, set width to 1400 pixels. The height will adjust automatically. For a portrait (vertical) or a square image, set height to 1050 pixels. The width will adjust automatically. Click OK. (Do not be concerned about resolution or file size. Do not change the resolution to 72 dpi.)
Now you can manipulate and sharpen your images suitable for digital projection.
Do not over-sharpen.
Do not save as .jpg file during editing as image quality may be lost. Save as a .jpg file only after all changes have been made. (Note: Read the sidebar article "JPEG Myths & Facts.)
Be sure your monitor is calibrated. We will not make colour corrections or other adjustments to the submitted digital files.
Rename each file in lower case to include; photographer's first and last name in full; and image name. (e.g. "devin_mckay_mountain_view.jpg") and save it as a .jpg high resolution (low compression) file.
Attach the files to an email and in the body of the email enter the "image name" and "your name".
Email your images to the Projected Images Night coordinator by 5:00 pm of the Sunday before the Monday meeting.
Do not put any copyright information or any text on the images.
If you do not follow the instructions exactly or you are late getting your images to the Projected Image Chair, your images may not get entered for the next evening. If you have any questions, please send an email to the Projected Images Night coordinator.
Details for Apple Mail Users
When submitting images using Apple Mail, please follow these steps:
In the New Message window, click the paper clip icon to attach your image(s)
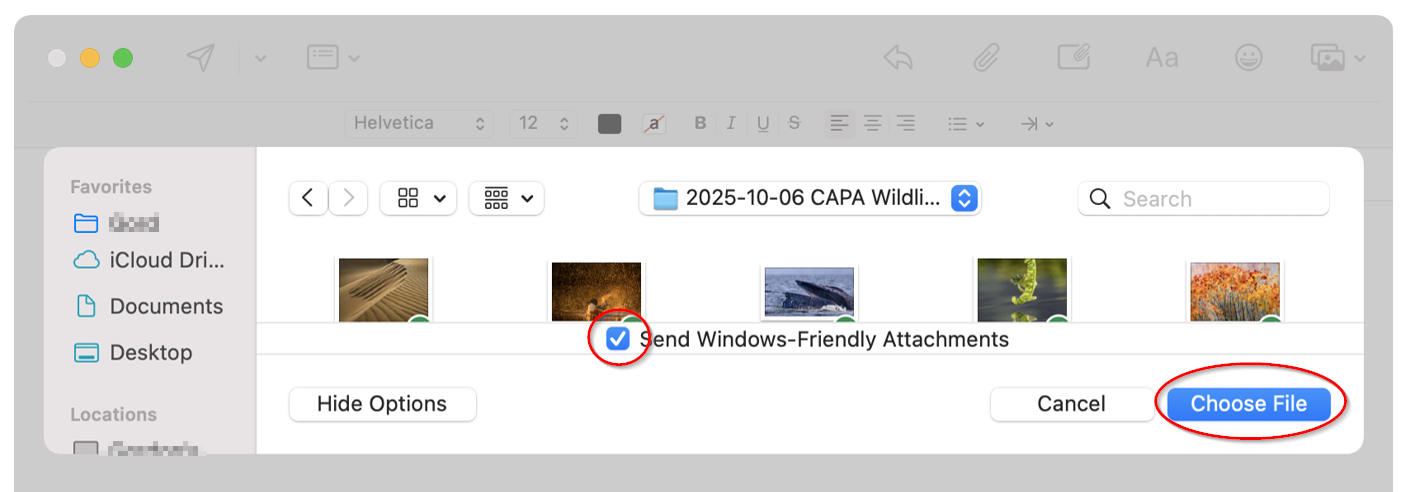
Choose Attach Files
Click Show Options
Check on Send Windows-Friendly Attachments (see below)
Select the image(s) that you want to send
Click on Choose File (see below)
If you prefer to have all of your emails default to the above setting, choose Edit > Attachments and check on Always Send Windows-Friendly Attachments.
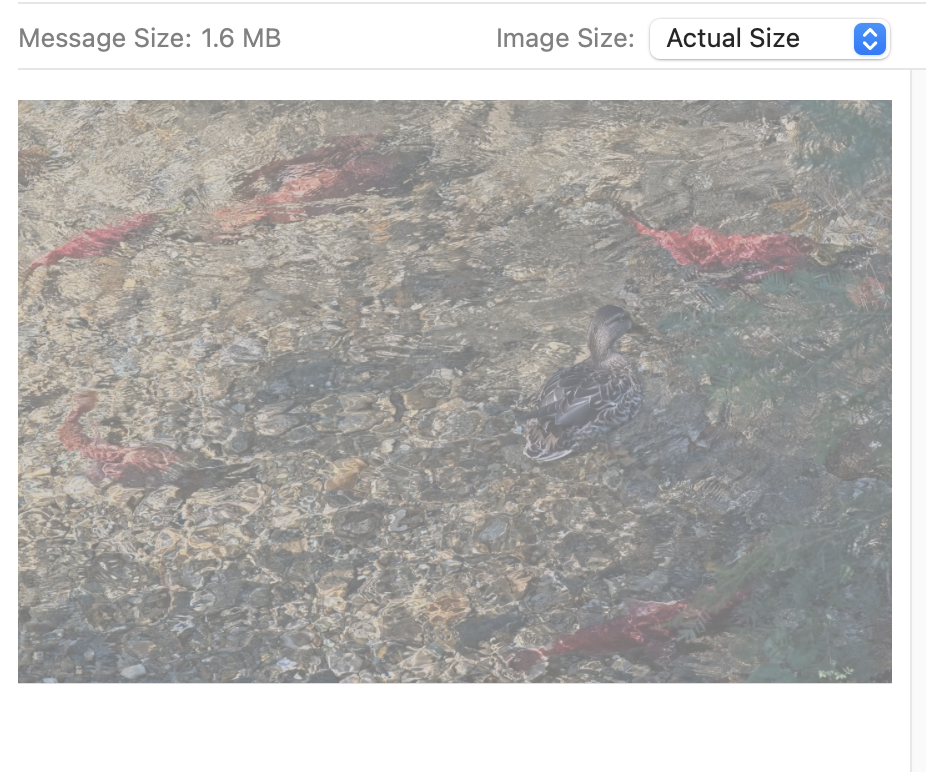
In addition, we have occasionally found that images from Apple Mail users end up too small. This is usually a setting in Apple Mail. When clicking on the “Send” button, please choose “Actual Size” as is shown below.


